With a long and somewhat chequered history, Jenkins can be considered the elder statesman of Continuous Integration and Continuous Delivery (CI/CD). It’s also the leading automation server on the market, so it makes the ideal candidate for continuing my ongoing series of “how to simplify CI/CD pipelines” begun in my previous posts on How to Build a CI/CD Pipeline for Python, How To Simplify CI/CD Pipelines For Windows, and Optimizing CI/CD Pipelines in GitHub Actions.
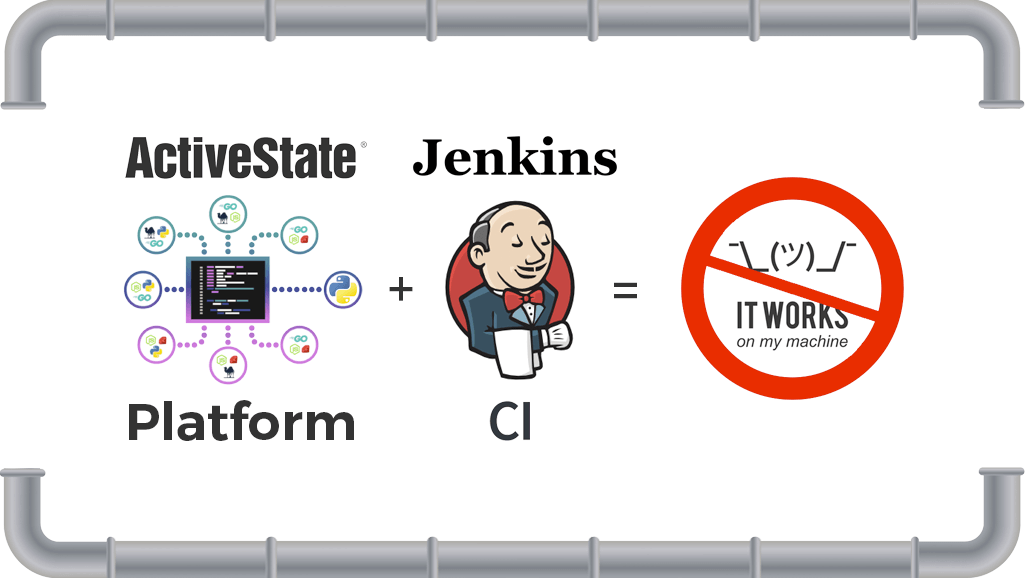
If you’ve wrestled with reproducibility issues, this post will explain how standardized tooling from ActiveState can simplify the setup of build environments by making the runtime environment perfectly reproducible not only on individual developer machines, but on CI/CD and production machines as well, with a single automatable command. Specifically, the ActiveState Platform, in conjunction with our CLI, the State Tool:
- Provides consistent reproducibility, eliminating “works on my machine” issues
- Ensures all dependencies are accounted for
- Does it all without introducing a new artifact to manage.
And in keeping with the theme of simplification, we’ll leverage the next generation CI/CD user experience on Jenkins by using the Blue Ocean plugin.
Do Build Scripts Need to be so Complex?
One of the most time consuming aspects of managing a CI/CD environment is managing the build scripts. In most modern cloud-based (or Cloud-Native) CI/CD systems, the complexity of managing complicated build configurations/steps is hidden behind a simple web interface, with most advanced functionality only accessible via settings deep in the UI, or sometimes not at all. Jenkins, being one of the more senior products in this space, and having been developed fully open source, has always had a more “raw” user interface that exposes most of the complicated functionality it offers directly to the user.
In order to keep up with the times, Jenkins developers have come up with a new user experience implemented in the Blue Ocean plugin (https://jenkins.io/projects/blueocean/), which they say is “a way to use Jenkins that even your boss’s boss can understand”. In practice, it greatly simplifies the configuration process without limiting the Jenkins implementation running in the background.
CI/CD Pipelines – Getting Started
Once again, I’ll be using a sample application (the same one I used in previous posts) written in Python and hosted on GitHub. Github will be our source of truth for the code, and we’ll use the ActiveState Platform as the source of truth for the runtime environment, which includes a version of Python and all the packages the Github project requires (note that Perl projects and runtimes can also be used). Jenkins will grab the source code from GitHub and the runtime from the ActiveState Platform, and then build and run its tests for a successful round of development iteration.
First things first:
- If you haven’t already done so, install a Jenkins server on a Linux box using the instructions provided at https://jenkins.io/
- Install the Blue Ocean Plugin using instructions provided at https://jenkins.io/doc/book/blueocean/getting-started/
- Sign up for a free ActiveState Platform account.
- Install the State Tool on Windows:
IEX(New-Object Net.WebClient).downloadString('https://platform.activestate.com/dl/cli/install.ps1')or, install the State Tool On Linux and Mac using:sh <(curl -q https://platform.activestate.com/dl/cli/install.sh) - Check out the runtime environment for this project located on the ActiveState Platform.
- Check out the project’s code base hosted on Github. Note that the source code project and the ActiveState Platform project are integrated using an activestate.yaml file located at the root folder of the Github code base. You can refer to instructions on how to create this file and how it works by referring to the ActiveState Platform docs here.
All set? Let’s dive into the details.
Integrating Jenkins with ActiveState
For Jenkins to be able to programmatically access the runtime on the ActiveState Platform, we’ll need to convert our credentials to an API Key and then add it to Jenkins’ global credentials.
1. From Jenkins’ home page, click the Credentials item on the left hand side.
2. Click the System leaf that opens up below, and then select “Global Credentials (unrestricted)” from the list:

3. Click on Add Credentials and create a new Secret Text kind of entry with an ID of api-key.

4. Now we’ll need to retrieve the API Key from the ActiveState Platform by first using the State Tool to authenticate:
state auth --username <yourname> --password <yourpassword>
And then running the following command:
curl -X POST "https://platform.activestate.com/api/v1/apikeys" -H "accept: application/json" -H "Content-Type: application/json" -H "Authorization: Bearer `state export jwt`" -d "{ \"name\": \"APIKeyForCI\"}"
The JSON response contains your API key in the “token” field (not “tokenID”).
5. Copy and paste the API Key (without the quotes) into the Secret field of the new global credential you created in Jenkins.
6. Click Save, and return to the Jenkins homepage.
You’re all set: Jenkins will now be able to pull the runtime environment from the ActiveState Platform at the time it runs the build.
Integrating Jenkins with Github
We also want Jenkins to also be able to programmatically pull the source code for our project from Github. We’ll use the new Blue Ocean UI to accomplish this as part of configuring our pipeline.
1. Switch to the Blue Ocean interface using the “Open Blue Ocean” item on the left hand side of the actions menu:

2. Click on the New Pipeline button on the top right:

3. Since our source code is hosted on GitHub, click on the Github icon, provide your Github access token, organisation and repository name.

4. Click the Create Pipeline button. Because this is a new pipeline, Jenkins will complain that there is no Jenkinsfile for this project in GitHub, so we’ll need to create one.
5. Under the Pipeline settings, set the Agent to “Any,” and define 2 environment variables:
- SHELL, which we’ll set to “/bin/bash” to get Jenkins to use bash. This is to be compatible with ActiveState CLI (a.k.a. State Tool) installation scripts.
- ACTIVESTATE_API_KEY, which we will set to “credentials(‘api-key’)” to be able to access the API key we previously entered in the credentials store.

Building CI/CD Pipelines with Jenkins
Now that we’ve set up the integration points, it’s time to create build steps.
1. Click the (+) sign in the middle of the screen to create a new step and name it “Install State Tool.” We’ll also need to set it’s type. All of our steps will be of the type “Shell Script,” which will require script code (see below).
2. Create another 4 steps and set them all to type “Shell Script”:
- Authenticate with the Platform
- Update Project
- Linting the Source
- Running the Tests

3. Click the Save button to save the pipeline and create a Jenkinsfile, which will be committed to the source code repo. You can check out the Jenkinsfile I’ve already created for the sample project on the GitHub repo. There you’ll see all the stages and the shell scripts associated with them. In summary:
- Installing the State Tool: This is the CLI to communicate with the ActiveState Platform, which will be used for all of the later steps. In this example, we do the installation here as one of the steps, but it can also be configured as a Global Tool in Jenkins (will require sudo access).
- Authenticating with the Platform: In this step, we log into the platform so the following steps can be executed in a secure way. This step isn’t strictly necessary if the platform project you’re using (as in this example) is public, but is required if you want to access your own private projects.
- Update the Project: In this step, we check to see if there have been any changes to the runtime environment configuration on the ActiveState Platform (e.g. new packages may have been added/removed, or a new version of an existing package may have been included to address a vulnerability, etc.). If there are any changes, the next step will re-download the updated environment.
- Linting the Source: This step runs a Python script using the instance of ActivePython in the virtual environment created by the State Tool when it installed the runtime environment. This is the point at which the State Tool will check the runtime environment for changes, and automatically re-download it, if required. Otherwise, the State Tool will just execute the linting script using the initialized runtime.
- Running the tests: Similar to the previous step, this is just a script to run pytest on the example code.
Note that the linting and testing scripts are State Tool scripts written in Python and executed in the virtual runtime environment setup by State Tool. In order to make sure they are executed in the ActivePython virtual environment using the version and dependencies you selected in your ActiveState Platform project, you should incorporate your scripts in the activestate.yaml file. For more information on creating scripts with the State Tool, please refer to the scripting documentation.
4. Once you’ve updated your steps with the necessary scripts, click the Save button. Note that every time you edit your pipeline and save it, the UI will ask you if you want to commit the Jenkinsfile to the repo and trigger a new build.

5. Click Save & Run to commit your changes to the repo. The Activity page is displayed:

6. Here you can view your builds. Click on any of the rows to see the details of the stages and steps that were executed. You can also drill down on the steps further to see the actual logs and diagnose any failures you might have.

If you do run into issues, remember that Jenkins is an extremely configurable and dynamic system, and the Blue Ocean plugin is a fairly new User Interface component. Check your Jenkins installation, with particular attention to global settings and installed plugins.
Conclusion
As one of the oldest CI/CD systems on the market, Jenkins has incorporated a wealth of features and functionality over the years that can make management both complicated and costly. The Blue Ocean plugin for managing Jenkins’ pipeline functionality is the current solution for reducing this complexity, while giving Jenkins users a more modern and polished CD experience.
But plugins like Blue Ocean don’t deal with aspects of application complexity, such as dealing with the dependency problems of various languages. By incorporating language distributions from the ActiveState Platform into your CI/CD tooling, you can reduce the headaches resulting from language issues, and let your developers focus on what matters most: your product.
- If you’d like to try it out, sign up for a free ActiveState Platform account where you can create your own runtime environment and download the State Tool. You will also be able to discover other benefits of the platform like how it helps eliminate the “works on my machine” problem, and helps resolve the build provenance issue.
- How does your enterprise’s practice of CI/CD compare to other enterprise’s CI/CD practice? Our State of Enterprise CI/CD 2020 survey has concluded and the results are here. Find our CI/CD resources here.

Related Blogs: